Fudgy Brownie Base • Creamy Peanut Butter Layer • Glossy Chocolate Fudge Topping • No Compromise
Peanut butter fudge brownie slab is the kind of recipe that Claire Malin saves for the moments that genuinely call for it — the celebrations that deserve something more than a standard sheet cake, the gatherings where the dessert table needs a centrepiece that makes people stop mid-conversation, the days when only three layers of pure, uncompromising decadence will do. This is not a casual weeknight bake. It is an occasion.
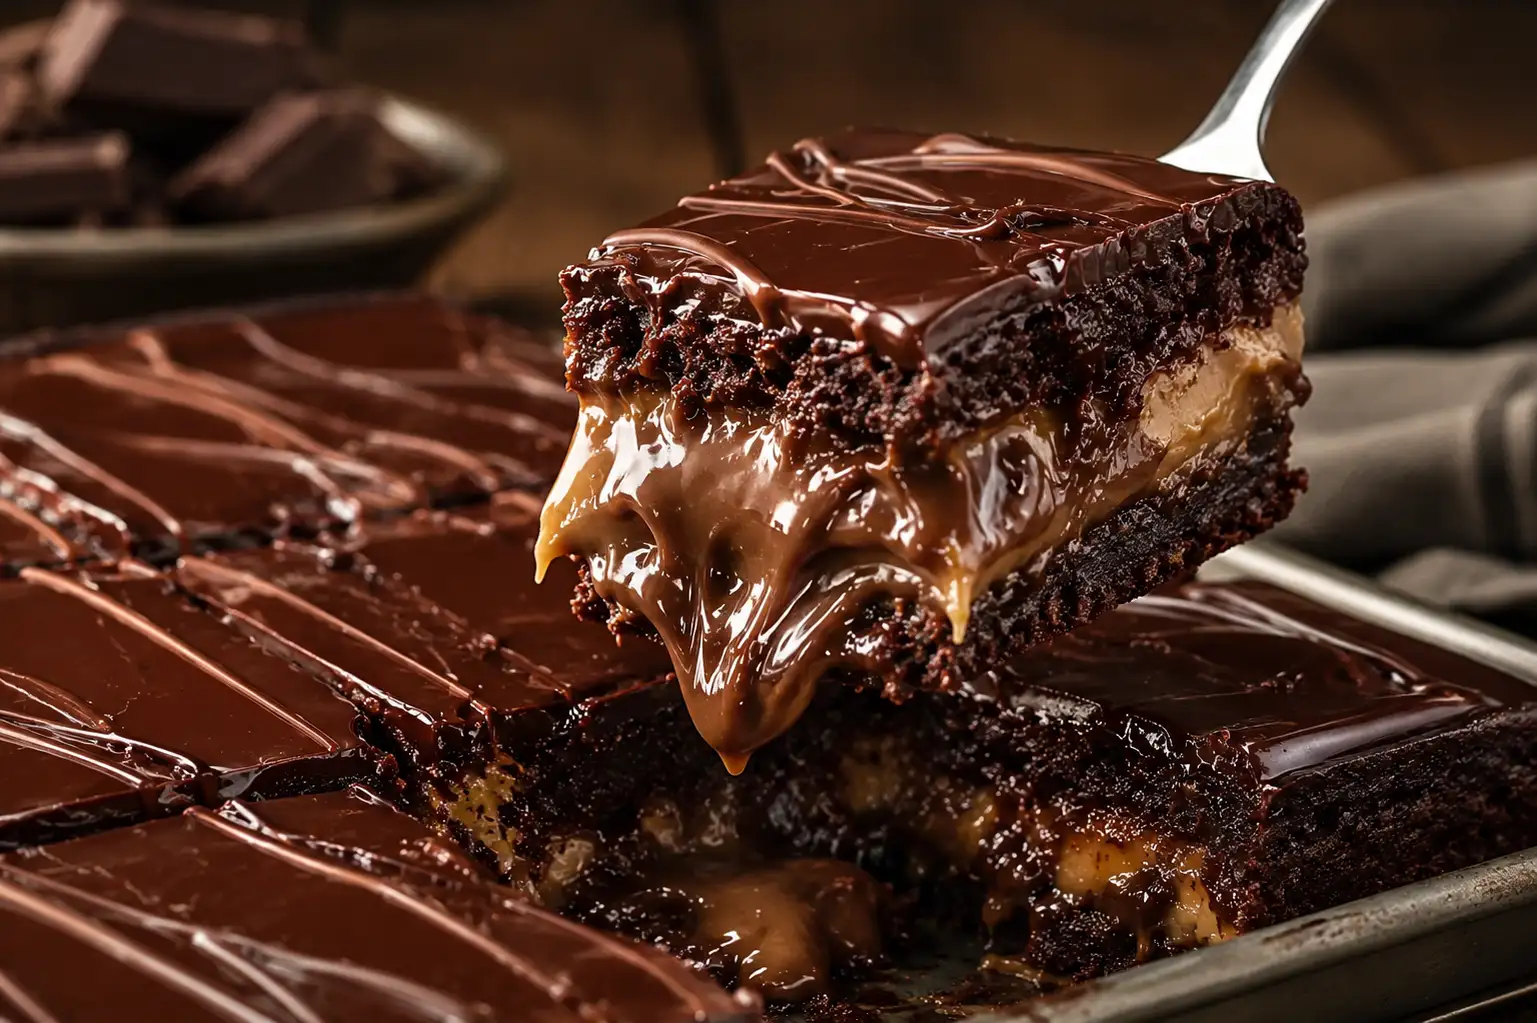
Three layers, each extraordinary on its own, each made better by the presence of the other two. First: a thick, fudgy brownie base built with melted butter, two kinds of sugar, cocoa powder, and a full cup of chocolate chips folded into the batter. Dense, dark, and barely set in the centre — the precise opposite of a cakey brownie, and deliberately so. Second: a creamy peanut butter layer of beaten peanut butter, softened butter, powdered sugar, and vanilla, spread thick and even over the cooled brownie base. Third: a glossy chocolate fudge topping of semi-sweet chocolate chips and heavy cream, poured and smoothed until it shines like the surface of something that should probably be illegal.
Chilled until firm, sliced into thick squares or slab-style bars, served at a table that immediately becomes quieter and more focused — this is the peanut butter fudge brownie slab in full. It feeds a crowd. It keeps beautifully in the refrigerator. And it earns, every single time, the reputation it deserves.
Table of Contents
Why This Peanut Butter Fudge Brownie Slab Is in a Category of Its Own
- Three fully distinct layers — fudgy brownie, creamy peanut butter, glossy fudge — each with its own texture and flavour, each enhancing the others in every single bite.
- The brownie base is deliberately underbaked to the edge of fudgy — dense, dark, and yielding in a way that boxed brownie mix simply cannot replicate.
- Peanut butter and chocolate is one of the most harmonious flavour pairings in baking. This slab does not use a hint of peanut butter — it uses a full, generous layer that holds its own against the deep chocolate of the brownie and the fudge.
- It feeds 16 to 20 people from one 9×13-inch pan, which makes it the ideal party, holiday, and potluck bake.
- The refrigerator does the final work — a 1 to 2 hour chill firms the layers into clean, sliceable bars that look like they came from a professional patisserie.
- It keeps well for up to 5 days — which means it can be made entirely ahead of any occasion and actually improves as the layers settle into each other.
Understanding the Three Layers
Layer 1 — The Fudgy Brownie Base
This brownie is built for density and fudginess, not lift and airiness. The combination of melted butter (not creamed — melted, which produces a denser, more fudgy crumb), both granulated and brown sugar (the brown sugar adds moisture and a caramel depth that white sugar alone cannot provide), and a full cup of both cocoa powder and chocolate chips creates a batter that bakes into something closer to a chocolate fudge slab than a conventional brownie.
The critical instruction here is: do not overbake. The centre should look set but still slightly soft — a toothpick inserted in the middle should come out with a few moist crumbs attached, never completely clean. A completely clean toothpick means you have gone too far and the brownie will be cakey rather than fudgy. Pull it at 28 to 30 minutes and trust the process.
Layer 2 — The Peanut Butter Layer
This is a no-bake peanut butter filling — the same technique used in classic peanut butter cups and peanut butter fudge — made by beating creamy peanut butter and softened butter until smooth, then adding powdered sugar, vanilla, salt, and just enough heavy cream to bring the mixture to a thick, spreadable consistency. The result is a layer that is rich, slightly firm when cold, and intensely peanut-buttery without being overpowering.
Use creamy peanut butter — not natural or organic, which separates and produces an oily layer rather than a stable, smooth filling. Standard commercial peanut butter (Jif, Skippy, or equivalent) has the right fat structure to hold together as a no-bake layer under refrigeration.
Layer 3 — The Chocolate Fudge Topping
A ganache-style topping made by melting semi-sweet chocolate chips with heavy cream, butter, and optionally a spoonful of peanut butter for additional richness and a flavour bridge between the top layer and the peanut butter beneath. The ratio of chocolate to cream produces a topping that is thick enough to set firmly when chilled but pours smoothly enough to self-level across the peanut butter layer. When chilled, it firms into a glossy, snappable surface — the visual signature of the slab.
The optional peanut butter in the fudge topping is not optional. Add it. It creates a ganache that tastes simultaneously of chocolate and peanut butter, connects the top and middle layers flavour-wise, and makes every bite coherent rather than simply stacked.
Ingredients
Makes 16–20 bars | Prep: 30 min | Bake: 28–35 min | Chill: 1–2 hours | Total: approx. 2 hrs 15 min
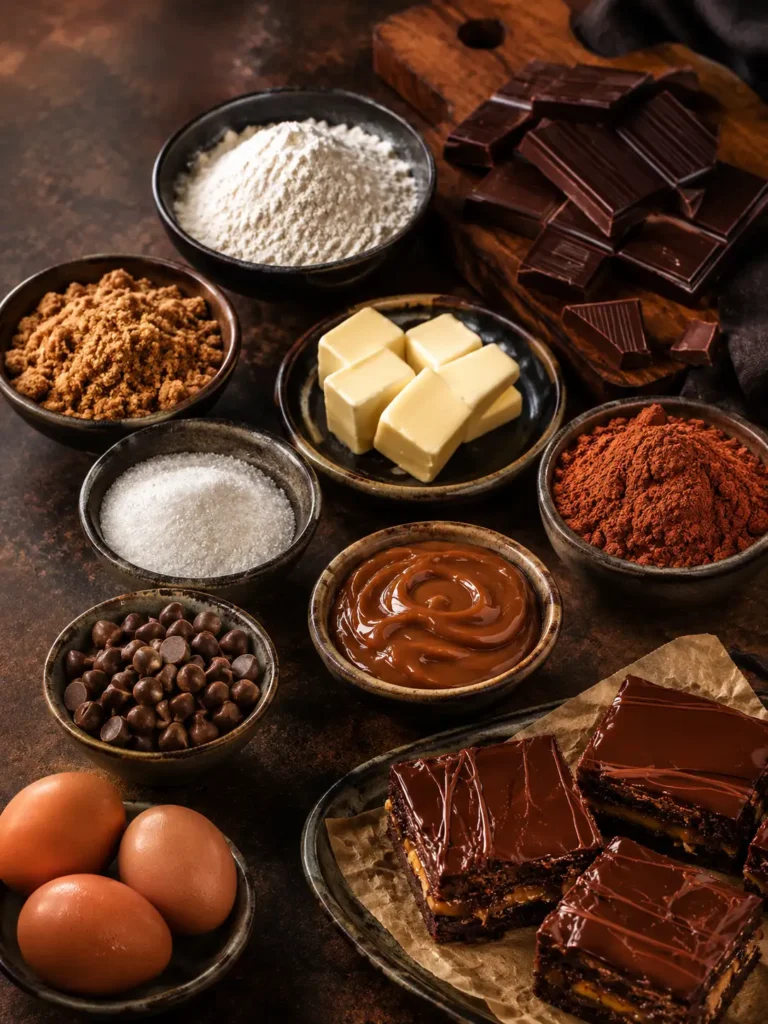
For the Fudgy Brownie Base:
- 1 cup (225g) unsalted butter, melted — not softened, not browned, simply melted
- 1 3/4 cups (350g) granulated sugar
- 3/4 cup (150g) light brown sugar, packed
- 4 large eggs, at room temperature
- 2 teaspoons pure vanilla extract
- 1 cup (125g) all-purpose flour
- 1 cup (90g) unsweetened cocoa powder — Dutch-process for deeper colour and flavour
- 1/2 teaspoon fine salt
- 1 cup (175g) semi-sweet or dark chocolate chips
For the Peanut Butter Layer:
- 1 1/2 cups (380g) creamy peanut butter — commercial, not natural
- 1/2 cup (113g) unsalted butter, softened to room temperature
- 2 cups (240g) powdered sugar, sifted
- 2 to 3 tablespoons heavy cream or whole milk — added gradually for consistency
- 1 teaspoon pure vanilla extract
- Pinch of fine salt
For the Chocolate Fudge Topping:
- 2 cups (350g) semi-sweet chocolate chips
- 3/4 cup (180ml) heavy cream
- 2 tablespoons unsalted butter
- 2 tablespoons creamy peanut butter — not optional; bridges the layers
How to Make the Peanut Butter Fudge Brownie Slab — Step by Step
Step 1 — Prepare the Pan
Preheat your oven to 350°F (175°C). Line a 9×13-inch baking pan with parchment paper, leaving at least 2 inches of overhang on the long sides — this is your sling for lifting the entire slab out cleanly after chilling. Lightly grease any exposed pan edges with butter. This preparation step is the difference between a slab that lifts cleanly and one that requires excavation. Do not skip the overhang.
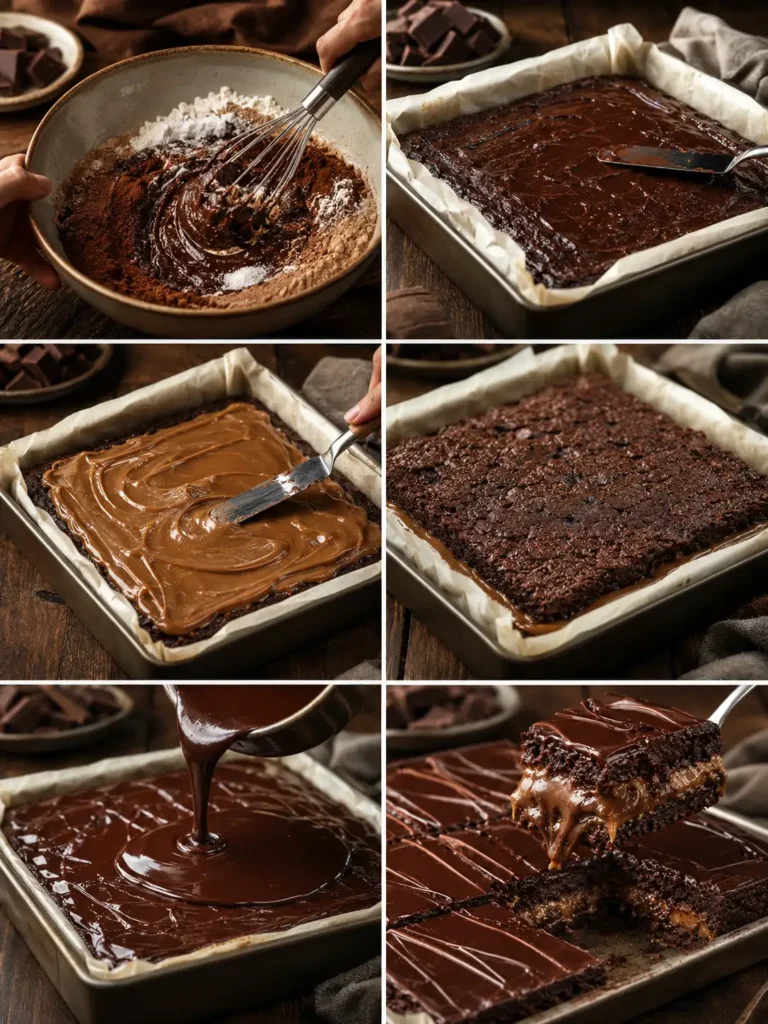
Step 2 — Make the Brownie Batter
In a large bowl, whisk the melted butter with the granulated and brown sugars until completely smooth and the mixture looks glossy — about 60 seconds of vigorous whisking. Add the eggs one at a time, whisking well after each, then add the vanilla extract and whisk until the mixture is thick, glossy, and pale.
Add the flour, cocoa powder, and salt. Switch from the whisk to a rubber spatula and fold gently until just combined — a few flour streaks remaining is preferable to an overmixed batter. Fold in the chocolate chips. The batter should be thick and glossy, almost like a soft chocolate fudge.
Step 3 — Bake the Brownie Base
Spread the batter evenly into the prepared pan using an offset spatula or the back of a spoon. The layer should be perfectly even — an uneven brownie base creates structural problems for the layers above it.
Bake at 350°F for 28 to 35 minutes. Check at 28 minutes: the edges should be set and the centre should appear barely set when you gently shake the pan. A toothpick inserted into the centre should come out with moist, fudgy crumbs — not wet batter, not clean. If it comes out completely clean, it is already slightly overbaked for this recipe.
Remove from the oven and allow to cool completely in the pan on a wire rack. This is non-negotiable — the peanut butter layer cannot go onto a warm brownie or it will melt into the surface and the two layers will fuse rather than remain distinct. Allow at least 1 full hour of cooling at room temperature, or speed this up by placing the pan in the refrigerator for 30 minutes once it has stopped steaming.
Step 4 — Make the Peanut Butter Layer
In a large bowl, beat the creamy peanut butter and softened butter together with an electric mixer on medium speed for 2 minutes until the mixture is smooth, uniform, and slightly lighter in colour. Add the sifted powdered sugar, vanilla extract, and salt. Mix on low speed initially — powdered sugar will billow — then increase to medium and beat until the mixture is thick and clumping together.
Add the heavy cream one tablespoon at a time, mixing between each addition, until the filling reaches a smooth, thick, spreadable consistency — similar to a very thick frosting that holds its shape but can be spread without cracking. You may not need all 3 tablespoons depending on the peanut butter brand.
Spread the peanut butter layer evenly over the completely cooled brownie base using an offset spatula. Work from the centre outward, pressing gently to fill the surface without disturbing the brownie beneath. The layer should be thick — at least 1 to 1.5 cm deep — and perfectly even from edge to edge. Refrigerate while you make the fudge topping.
Step 5 — Make the Chocolate Fudge Topping
Combine the chocolate chips, heavy cream, butter, and peanut butter in a large microwave-safe bowl. Microwave in 20-second intervals, stirring thoroughly between each, until the mixture is completely melted and smooth. This typically takes 3 to 4 intervals. Do not microwave for longer than 20 seconds at a time — chocolate overheats quickly and will seize rather than melt smoothly. If you prefer, melt over a double boiler with gentle heat.
The finished ganache should be glossy, pourable, and completely lump-free. Allow it to sit at room temperature for 3 to 4 minutes to thicken very slightly — just enough that it will pour and spread without running off the peanut butter layer immediately.
Step 6 — Assemble and Chill
Remove the pan from the refrigerator. Pour the chocolate fudge topping over the peanut butter layer in a slow, even stream, starting from the centre. Use an offset spatula to spread it gently and evenly to all four edges, creating a smooth, shiny surface. Do not press or overwork — the ganache needs to self-level as much as possible.
Refrigerate the assembled slab for a minimum of 1 hour, or until the fudge topping is completely set and firm to the touch. 2 hours produces a cleaner slice. Overnight is ideal — the three layers fully consolidate and the slab slices like a dream.
Step 7 — Slice and Serve
Use the parchment overhang to lift the entire slab out of the pan onto a cutting board. Run a sharp chef’s knife under hot water, wipe dry, and cut into squares or bars with a single, firm downward motion — do not saw back and forth, which drags the layers. Wipe the knife clean between every cut. For clean, photo-worthy slices, cut into a 4×4 or 4×5 grid for 16 to 20 pieces. Serve at the temperature that suits the occasion — cold for maximum structure, room temperature for maximum creaminess.
Baker’s Notes — What Makes the Difference
Melt, don’t cream, the butter for the brownie. Melted butter produces a denser, fudgier crumb. Creamed butter produces a lighter, cakier texture. This recipe needs melted butter and the difference is not subtle.
Dutch-process cocoa for the deepest flavour. Dutch-process cocoa has been treated to neutralize acidity and produces a darker, smoother, more intensely chocolatey flavour than natural cocoa. If you only have natural cocoa, the brownies will still be excellent — just slightly lighter in colour and with a sharper, more acidic chocolate note.
Do not overbake the brownie base. The most common mistake with layered brownie slabs is baking the base until fully done — which means overbaked, since it will firm further as it cools and chill. Pull at the first sign of a set centre. You want fudgy, not cakey.
Use commercial peanut butter for the filling layer. Natural peanut butters separate and produce an oily filling that cannot be stabilized with powdered sugar alone. Commercial peanut butter (stabilized with palm oil or similar) remains emulsified and produces a smooth, stable no-bake layer.
Sift the powdered sugar. Unsifted powdered sugar creates lumps in the peanut butter filling that cannot be beaten out fully. A 30-second sift before adding it to the bowl produces a filling that is genuinely, visibly smoother.
Add peanut butter to the fudge topping. The two tablespoons of peanut butter in the ganache may seem redundant given the entire layer of peanut butter beneath it, but it serves a structural and flavour purpose: it creates a flavour bridge between the topping and the middle layer, and it slightly stabilizes the ganache, making it less likely to crack cleanly away from the peanut butter layer when sliced.
Warm knife, clean between cuts. The enemy of a clean slice through a layered bar is a knife that drags the top layer. Hot water, dry wipe, single downward press, clean again. Every cut.
Variations Worth Baking
Salted Caramel Peanut Butter Fudge Brownie Slab: Add a layer of thick salted caramel sauce (2 to 3 tablespoons, store-bought or homemade) spread directly onto the brownie base before the peanut butter layer. The caramel adds a fourth element — salt, sweetness, and a sticky layer that makes the slab even more complex and even harder to stop eating. Finish with a generous sprinkle of flaky sea salt over the fudge topping.
Espresso Chocolate Fudge Brownie Slab: Add 2 teaspoons of instant espresso powder to the brownie batter along with the cocoa. Coffee does not make brownies taste like coffee — it deepens and amplifies the chocolate flavour in a way that is remarkable. The espresso brownie base under the peanut butter and fudge layers is extraordinary.
Dark Chocolate and Almond Butter Slab: Replace the creamy peanut butter throughout with almond butter and use 70% dark chocolate chips in both the brownie batter and the fudge topping. A more sophisticated, slightly less sweet version that works beautifully for a dinner party dessert where the table is made up of people who say they don’t like things too sweet.
Reese’s Pieces Loaded Slab: Press a full cup of Reese’s Pieces candy into the peanut butter layer before adding the fudge topping, pressing them gently so they are half-submerged. Scatter more over the finished fudge topping before it sets. A version designed entirely for people who have never once been told their dessert was too much.
Mini Individual Slabs: Divide the full recipe between two 8×8-inch square pans instead of one 9×13. The thinner layers produce a different eating experience — more crust, slightly thinner layers, a more balanced bite. Ideal for packaging individually as gifts, which is perhaps the most thoughtful thing you can do for someone who deserves good chocolate.
How to Serve the Peanut Butter Fudge Brownie Slab
- Cold, straight from the refrigerator — maximum structure, cleanest slices, the fudge topping at its snappiest and most dramatic
- At room temperature, rested for 10 to 15 minutes — the peanut butter layer softens slightly and becomes creamier, the brownie base yields more readily under a fork, the entire slab feels more indulgent
- As a holiday table centrepiece — the slab on a wooden board, cut but still assembled, with a serving knife: an arresting visual
- Cut into small 2-inch squares for a dessert buffet or sweet table — one pan produces 30 to 35 bite-size pieces this way
- Warmed very briefly (10 seconds in the microwave) with a scoop of vanilla ice cream — not traditional, not restrained, entirely correct
- Packaged individually in wax paper for gifting — a peanut butter fudge brownie slab square is one of the best edible gifts a person can receive
Storage & Make-Ahead
The peanut butter fudge brownie slab stores exceptionally well — one of its greatest practical virtues. Store in an airtight container in the refrigerator for up to 5 days. Remove from the refrigerator 10 minutes before serving to allow the peanut butter layer to soften slightly and the full flavour of all three layers to come forward. Cold suppresses flavour; room temperature reveals it.
Make-ahead: the slab can be made up to 3 days ahead and refrigerated whole, unsliced, covered tightly in plastic wrap. Slice on the day of serving for the cleanest cuts and freshest presentation.
Freezing: the assembled, unsliced slab freezes well for up to 2 months. Wrap tightly in two layers of plastic wrap and one layer of aluminium foil. Thaw overnight in the refrigerator. Slice from chilled for the cleanest result. Individual sliced bars can also be frozen separately on a lined sheet pan and then transferred to a zip-lock bag — thaw individual bars at room temperature for 20 minutes.
Why This Belongs on a Southern Bites Table
Southern baking has always understood that some occasions demand generosity on a scale that polite restraint cannot accommodate. The church potluck where everyone brings something and the dessert table needs to feed forty. The holiday gathering where Grandma’s table needs a chocolate dessert that holds its own next to every other dish. The birthday where the cake is good but someone always brings a pan of brownies that empties first.
The peanut butter fudge brownie slab is that pan. It is Southern Bites in its deepest sense — not a delicate, composed dessert for a small table, but a slab of something genuinely, unapologetically great, cut into pieces and shared with everyone. It asks nothing of you after the chill time is done. It requires no plating, no garnish, no explanation. It speaks entirely for itself.
Claire Malin has always believed that the best Southern baking is built for sharing. This slab feeds a crowd, keeps beautifully, and earns its reputation at every table it appears on. Make it for the moments that call for something real.
A Final Word from the Southern Bites Kitchen
There will be a moment, sometime after the fudge topping has set and you lift the entire peanut butter fudge brownie slab out of the pan onto a cutting board, when you will understand exactly what this recipe is for. The three layers visible from the side: dark brownie, pale peanut butter, glossy fudge. The knife going through all of them cleanly, producing a bar that holds its shape and looks like something from a bakery case.
That is the moment this recipe exists for. Not the eating — though the eating is extraordinary — but the lifting, the cutting, the looking at something you made with four components and some patience and recognising that it is, in fact, exactly as good as it looks.
Make it for people who deserve it. They will not forget it.
More Southern recipes worth savoring — timeless family classics, grandmother’s kitchen secrets, and Claire Malin’s own take on the flavors that have always called the South home. Follow us on AstroRecipes and never miss a recipe.
Recipes I Think You’ll Love