You know that warm, expectant feeling on a cold evening when the house smells like sugar and spice? You can capture that in a single tray with a recipe that feels like memory and moves at the speed of your season.
This easy version uses just four ingredients: dark or semi-sweet chocolate, white chocolate, peppermint extract, and crushed candy canes. Hands-on time is about 30 minutes, and you’ll chill and cut the slab in one relaxed sitting.
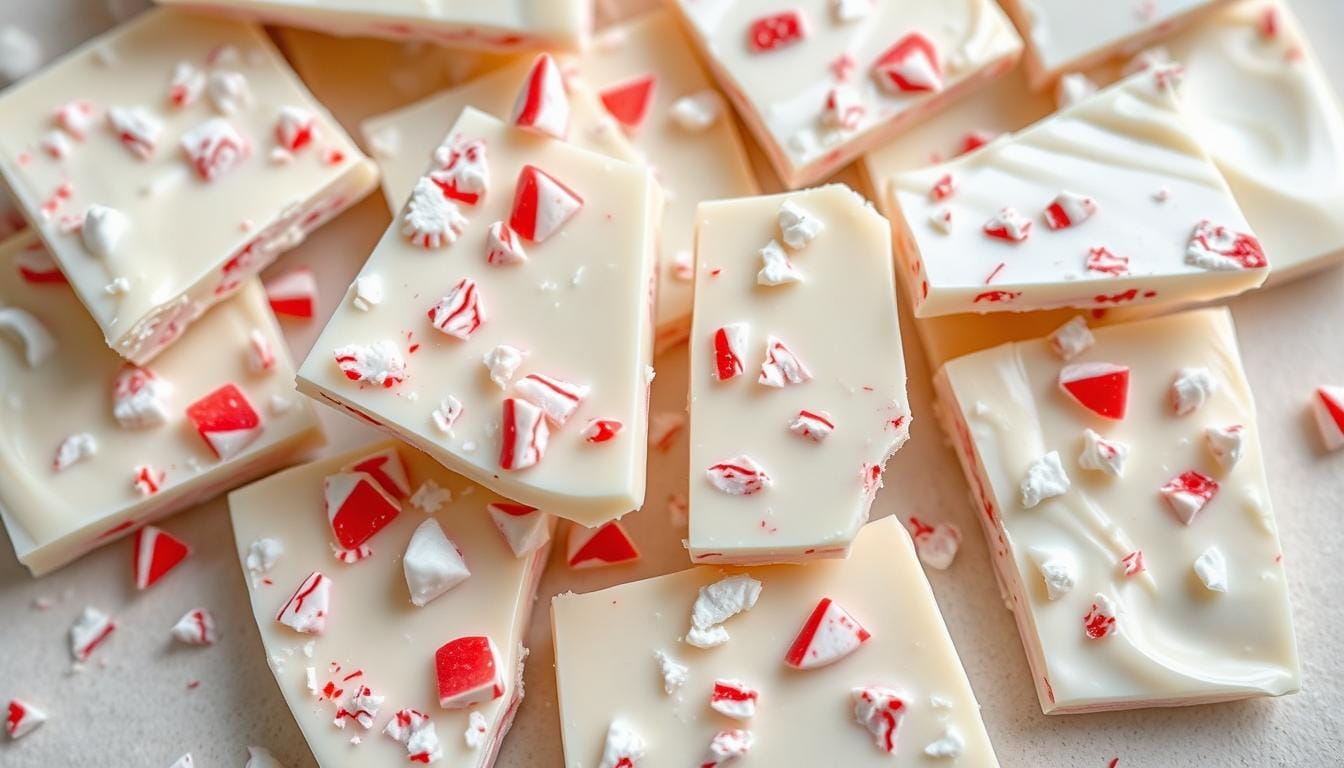
You’ll learn how to melt two chocolate layers, press them together for a glossy finish, and choose a 9×13 pan for chunky squares or a rimmed sheet for snappy shards. The method fits gift runs, potlucks, and last-minute holiday treats.
Store your finished pieces in an airtight container in the fridge for up to three weeks, and you’ll have a reliable batch to brighten cold nights and busy days.

Peppermint Bark (Easy Holiday Candy)
Equipment
- 9×13-inch pan or rimmed baking sheet for shaping bark
- microwave-safe bowl for melting chocolate
- offset spatula for spreading layers smoothly
- zip-top bag to contain candy canes while crushing
- rolling pin or meat tenderizer for crushing candy canes
- foil or parchment to line the pan
Ingredients
- 12 oz dark or semi-sweet chocolate, chopped
- 16 oz white chocolate bars or discs, chopped
- ¾ tsp peppermint extract, divided
- 8 regular-size candy canes, crushed
Instructions
- Line a 9×13-inch dish with foil. Coarsely chop the dark or semi-sweet chocolate and place it in a microwave-safe bowl. Heat in 30-second bursts, stirring between, for about 2 minutes until smooth. Stir in 1/4 teaspoon peppermint extract.
- Spread the melted chocolate into an even bottom layer in the lined pan. Refrigerate until almost set, about 25 minutes.
- Crush the candy canes in a zip-top bag using a rolling pin or meat tenderizer until you get a mix of coarse and fine pieces.
- In a clean bowl, melt the white chocolate in 30-second microwave bursts (about 1.5 minutes total). Stir in the remaining 1/2 teaspoon peppermint extract.
- Drizzle the white chocolate over the dark base and smooth with an offset spatula. Immediately sprinkle the crushed candy canes on top and press gently to help them adhere.
- Refrigerate the slab until fully set, about 35 minutes. Let sit at room temperature for 10 minutes before cutting or breaking into pieces.
Notes
Nutrition
Table of Contents
Why You’ll Love This Easy Homemade Holiday Treat
Fast, family-friendly, and endlessly customizable, this candy is an ideal finish to your seasonal baking list.
You get festive flavor with minimal effort: it’s an easy make that looks impressive without fussy steps. Kids can help pour, spread, and crush hard candy, turning the recipe into a shared activity.
Enjoy a clean peppermint aroma balanced by a creamy chocolate base. Break the slab into irregular pieces or cut neat squares for trays and boxes.
“A quick tray that stores well and travels better than many cookies — perfect for gifts and last-minute parties.”
- Scale the batch up or down without changing technique.
- Choose semi-sweet or darker chocolate to match your taste.
- Stores in an airtight container for weeks, so you can prep ahead.
Bottom line: this simple recipe gives you a festive homemade candy that is fast to make, fun to share, and reliable every time.
Peppermint Bark: Ingredients & Tools at a Glance
Start with a clear shopping list and a few simple tools to get consistent results every time.
Ingredients you’ll need: 12 oz dark or semi-sweet chocolate for the base and 16 oz white chocolate bars or discs for the top. Use 3/4 teaspoon peppermint extract total—1/4 teaspoon in the base and 1/2 teaspoon in the white layer for even flavor. Add crushed candy canes for crunch and color.
Flavor boosters
Use a small amount of extract rather than oil for a clean mint note. If you prefer peppermint oil, add it sparingly—start with a drop and taste. Too much will overpower the chocolate.
Tools you need
Line a 9×13-inch pan for thicker squares, or pick a rimmed baking sheet for thin, snappy shards. Bring a heatproof bowl for melting, and keep a small offset spatula on hand to spread smooth layers. Use parchment or foil to lift the slab easily.
Smart substitutions
Choose white chocolate bars or discs for predictable melting. If you use chocolate chips, pick brands with real cocoa butter (for example, Guittard Choc-au-Lait) so they melt smoothly. Avoid candy melts to keep real cocoa flavor and gloss.
“Choose bars or discs over candy melts for the best texture and shine.”
- Decide thickness up front by using a 9×13 dish or a sheet.
- Keep a rolling pin or meat tenderizer to crush canes evenly.
- Line the pan to lift and cut cleanly with less mess.
Step-by-Step: How to Make Peppermint Bark
Start by prepping your pan and chopping the base chocolate; the rest falls into place with a few timed melts and quick chills.
Line a 9×13-inch dish with foil. Coarsely chop 12 oz dark or semi-sweet chocolate and place it in a microwave-safe bowl. Heat in 30-second bursts, stirring between, about 2 minutes total until smooth. Stir in 1/4 teaspoon peppermint extract.
Spread the melted chocolate into an even bottom layer and refrigerate until almost set, about 25 minutes. While it firms, crush 8 regular-size candy canes in a zip-top bag using a rolling pin or meat tenderizer to get a mix of shards and fine dust.

In a clean bowl, melt 16 oz white chocolate in the microwave in 30-second bursts (about 1 1/2 minutes). Stir in the remaining 1/2 teaspoon peppermint. Drizzle the white layer over the chilled base and smooth with a small offset spatula.
Sprinkle crushed candy canes across the top and press gently so pieces adhere. Refrigerate until fully set, about 35 minutes. Break into pieces or let sit 10 minutes at room temperature before cutting for cleaner edges.
| Step | Time | Tool |
|---|---|---|
| Chop & melt base chocolate | ~2 minutes (microwave bursts) | bowl, microwave |
| Chill bottom layer | ~25 minutes | 9×13-inch dish |
| Crush candy canes | 2–5 minutes | rolling pin or meat tenderizer |
| Melt white & assemble | ~1.5 minutes melt + 35 minutes chill | offset spatula, baking sheet optional |
Pro Tips for Perfect Layers, Snap, and Shine
Small adjustments in ingredients, heat, and timing will change your final texture and look. Follow these quick tips to get smooth white layers, a crisp snap, and a glossy finish.

Choosing white chocolate
Pick white chocolate that contains cocoa butter. Real cocoa butter lets the top layer melt smooth, set shiny, and taste like true chocolate rather than a confectionery coating.
Use white chocolate bars or reliable white chocolate chips such as Guittard Choc-au-Lait for best results. Avoid candy melts when you want flavor and sheen.
Thickness & pan choice
Decide thickness before you start. A 9×13-inch dish gives a hearty, chewy square.
A rimmed baking sheet yields thin shards with a louder snap—ideal for tins and gift jars.
Melting methods and temperature control
Gently melt chocolate in short microwave bursts, stirring between intervals, or use a low-heat double boiler.
Stir until a few small lumps remain, then remove from heat; residual temperature finishes melting and prevents scorching.
Flavoring: extract vs oil
Use 3/4 teaspoon peppermint extract divided between the two layers for balanced flavor. If you substitute peppermint oil, add only a drop or two—it’s much stronger.
Cutting and serving
For clean cuts, let the slab sit a few minutes at room temperature before slicing. Warming a dry knife slightly and using an offset spatula to lift pieces gives neater squares.
Troubleshooting common issues
Prevent bloom and streaks by keeping water away from chocolate and avoiding overheating.
If you see soft spots, make sure the first layer was almost set—not fully hard—before pouring the second; that helps layers bond without slipping.
| Issue | Cause | Quick Fix | Best Practice |
|---|---|---|---|
| Soft spots | Second layer added too soon or too warm | Chill base until almost set; cool white chocolate slightly before pouring | Use an offset spatula to spread thinly and evenly |
| Bloom (white film) | Temperature swings or moisture | Store chilled in an airtight container; avoid water contact | Melt gently and cool steadily |
| Scorching or grainy melt | Overheating in microwave or direct high heat | Stop heating early; stir to finish melting off heat | Use short microwave bursts or a low double boiler |
Serving Ideas and Fun Ways to Use Your Bark
Keep a jar of broken slabs on hand so you can add crunch and cool flavor to last-minute desserts. These mint-chocolate pieces work best when you match portion size to the dish.
Use shards to finish drinks, frozen treats, and baked goods for instant flair.
Stir into hot chocolate or sprinkle on ice cream
Drop a few shards into steaming hot chocolate. They melt into a minty swirl that brightens each sip.
Or sprinkle crushed pieces over vanilla or coffee ice cream for crisp contrast and a peppermint pop.
Fold chopped pieces into cookies, brownies, or bars
Gently fold chopped slabs into cookie or brownie batter to create pockets of white and dark chocolate. The candy shards add texture without sogginess.
Decorate cakes, cupcakes, or holiday cookie plates
Top cakes and cupcakes with jagged pieces for a bakery-made look. Tuck small pieces among cookies on a plate to add shine and variety.

| Use | Best paired with | Portion |
|---|---|---|
| Hot chocolate | Milk or dark chocolate drink | 2–3 shards per cup |
| Ice cream topping | Vanilla, coffee, or chocolate | 1–2 tablespoons sprinkle crushed |
| Mix-in for cookies | Chocolate chip or sugar cookie | 1/2 cup chopped pieces per batch |
| Cake or cupcake garnish | Frosted layer cake | Large shards on top for drama |
Make-Ahead, Storage, and Gifting
Timing and a cool storage spot are the keys to crisp layers and easy packaging. Plan a single session to make a few slabs and you’ll save time during busy holiday baking.
Storage: Store your finished pieces in an airtight container in the refrigerator for up to three weeks to keep the chocolate firm and the peppermint bright.
Make-ahead timing: You can make the slab days in advance. Let it set at room temperature if the room is cool, or chill for 1–2 hours before portioning. This gives you firm pieces that are easy to sort and pack.
Gifting tips
Layer parchment between pieces in cookie tins to prevent sticking and protect decorative tops. Keep tins in a cool room or an insulated bag during transport so the candy stays crisp and doesn’t smudge.
- Make slabs on a baking sheet for faster batches and easy breaking.
- Sort pieces by size for even gift boxes and nicer presentation.
- Allow extra time for labeling and ribbons—this simple chocolate makes a polished present.
| Task | Best practice | Why it helps |
|---|---|---|
| Short-term storage | Airtight container in fridge (up to 3 weeks) | Keeps layers crisp and flavor fresh |
| Make-ahead | Set in a cool room or chill 1–2 hours | Firms pieces for clean breaking and packing |
| Gifting & transport | Layer parchment in tins; keep in cool room | Prevents sticking and topping damage |
“This candy stays fresh longer than many cookies, so it’s perfect for gifting and holiday trays.”
Conclusion
With just 12 oz dark (or semi-sweet) chocolate, 16 oz white chocolate, 3/4 teaspoon extract, and eight regular-size candy canes, you can make a polished slab in about an hour with roughly 30 minutes hands-on. Use a 9×13 pan for thick squares or a rimmed sheet for snappy shards.
Follow the simple steps—melt in a bowl or microwave, chill the bottom layer, melt the white chocolate, then sprinkle crushed candy canes and press lightly.
You’ll repeat this easy make for gifts and trays. Keep a bowl, spatula, and a rolling pin or meat mallet nearby to crush canes. Let pieces sit a few room temperature minutes before cutting for sharp edges and glossy layers.
Use the method and ingredients here as your holiday candy plan to get consistent, photo-ready peppermint bark every time.
FAQ
What basic ingredients do you need to make this easy homemade holiday treat?
Can I substitute white chocolate chips for a white chocolate bar?
What’s the best way to crush candy canes without a mess?
Should I melt chocolate in the microwave or use a double boiler?
How do I get clean layers and a nice snap to the chocolate?
How much peppermint extract or oil should I use?
Why did my white layer get streaks or a grainy texture?
How long should I chill before cutting or breaking the pieces?
What’s the best way to store finished pieces and how long do they last?
Can I use the crushed pieces in other recipes?
Any gifting tips to keep treats looking fresh during transport?
Discover what’s cooking behind the scenes and beyond—find us on https://www.facebook.com/astrorecipes1.