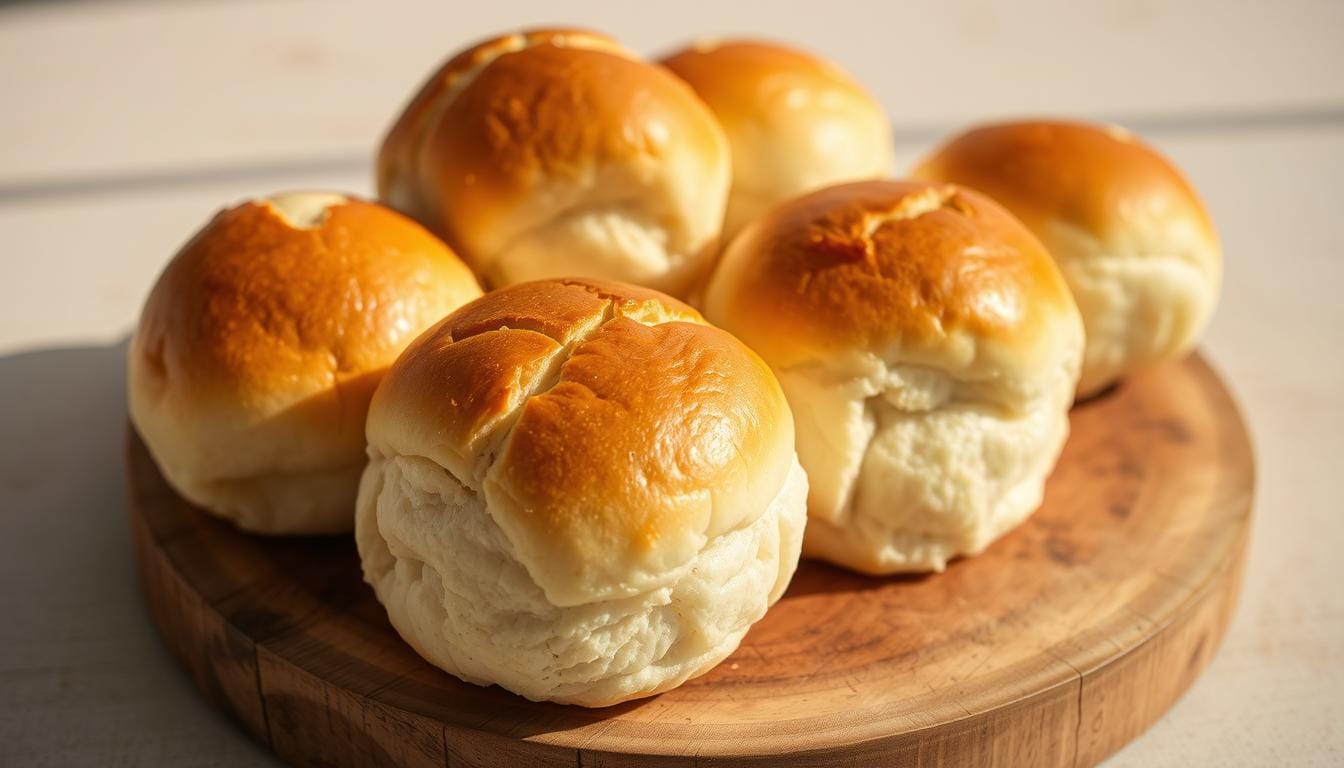
Every family gathering needs something special. Nothing warms the table like freshly baked dinner rolls. The smell of bread rising in my grandmother’s kitchen was magical.
Creating the best dinner rolls is more than following a recipe. It’s about turning simple ingredients into golden, soft treasures. These bread recipes will help you make dinner rolls that are irresistible.
In just five simple steps, you’ll learn to make homemade dinner rolls. Your family and friends will ask for seconds. This recipe makes the process easy, so anyone can do it.
Get ready to fill your kitchen with an incredible aroma. Create dinner rolls that will become a cherished tradition in your home.
Homemade Dinner Rolls
Equipment
- Mixing Bowl
- Measuring Cups
- dough hook or hands
- kitchen towel
- Baking sheet
- Oven
- pastry brush (optional)
Ingredients
- 4 cups all-purpose flour
- 2¼ tsp active dry yeast
- 1 cup warm milk (110–115°F)
- ¼ cup granulated sugar
- ¼ cup unsalted butter, softened
- 1 tsp salt
- 2 large eggs
Instructions
- Activate the yeast by combining it with warm milk and a pinch of sugar. Let sit for 5–10 minutes until foamy.
- In a large bowl, combine the activated yeast mixture, flour, butter, salt, and eggs. Mix until a soft, sticky dough forms.
- Knead the dough by hand for 8–10 minutes or use a stand mixer for 5–7 minutes until it becomes smooth and elastic.
- Place the dough in a greased bowl, cover with a towel, and let rise in a warm area for 60–90 minutes, or until doubled in size.
- Punch down the dough and divide into 12 equal portions. Shape into balls and place on a baking tray. Cover and let rise for another 45–60 minutes.
- Preheat oven to 350°F (175°C). Bake for 20–25 minutes or until golden brown. Brush with melted butter and serve warm.
Notes
Nutrition
Table of Contents
Why Homemade Dinner Rolls Are Worth It
Making your own Bread Rolls Recipe turns a simple meal into a special event. Homemade dinner rolls add magic to your kitchen, perfect for Holiday Sides and Christmas Dinner.
When you bake rolls from scratch, you open up a world of flavors. It’s not just about food; it’s about making memories and sharing warm, fresh goodness with your family.
Unmatched Freshness and Flavor
Homemade dinner rolls have amazing benefits:
- Incredible fresh-baked aroma that fills your entire home
- Rich, authentic yeast flavor impossible to replicate commercially
- Complete control over ingredient quality
- Warm rolls straight from your oven
Customization Possibilities
Your Bread Rolls Recipe is a blank canvas for creativity. You can make your rolls unique by:
- Adding fresh herbs like rosemary or thyme
- Incorporating cheese or garlic
- Experimenting with different flour types
- Creating unique shapes for special occasions
Homemade rolls make any meal special, whether it’s for Christmas Dinner or a casual family gathering. They add a touch of warmth and love to your table with just a little effort.
Ingredients You’ll Need for Perfect Dinner Rolls
Making Soft Dinner Rolls is all about the ingredients. Whether it’s Quick Dinner Rolls for a weeknight or Dinner Buns for a big event, quality matters. It’s the key to success.
To make perfect dinner rolls, you need to know each ingredient’s role. They work together to create the perfect texture and flavor.
Essential Ingredients for Soft Rolls
- All-Purpose Flour: The foundation of your dinner rolls, providing structure
- Active Dry Yeast: Crucial for helping the dough rise and develop flavor
- Warm Milk: Adds richness and helps activate the yeast
- Granulated Sugar: Feeds the yeast and adds a subtle sweetness
- Unsalted Butter: Creates a tender, soft texture in your rolls
- Salt: Enhances overall flavor profile
Optional Flavor-Boosting Add-Ins
Want to make your Quick Dinner Rolls special? Try these optional ingredients:
- Fresh Herbs: Rosemary, thyme, or chives
- Shredded Cheese: Parmesan, cheddar, or garlic cheese
- Minced Garlic: For a savory twist
- Dried Herbs: Italian seasoning blend
- Everything Bagel Seasoning: For a crunchy topping
Pro tip: Mix and match these add-ins to make unique Dinner Buns. They’ll wow your family and guests!
Step 1: Preparing the Dough
Starting with the Easy Dinner Rolls Recipe Quick means first preparing your dough. This step is key to your bread’s texture and taste.
Activating the Yeast
Yeast activation is vital for soft, fluffy dinner rolls. Follow these steps:
- Use warm milk between 110-115°F
- Add a pinch of sugar to feed the yeast
- Let the mixture sit for 5-10 minutes
Your yeast is ready when it’s foamy and bubbling. This shows the yeast is alive and will make your dough rise well.
Mixing Ingredients Perfectly
Mixing ingredients needs care. Begin by gathering these:
- Activated yeast mixture
- All-purpose flour
- Softened butter
- Salt
- Eggs
Mix the ingredients slowly, aiming for a soft, sticky dough. This dough will turn into delicious Fluffy Dinner Rolls. Remember, don’t overmix to avoid tough rolls.
Step 2: Kneading the Dough
Creating perfect Sweet Dinner Rolls begins with kneading. This step turns a mix of ingredients into a smooth, elastic dough. It will become the delightful Breakfast Rolls you want.

The Science Behind Kneading
Kneading is more than just pushing dough. It develops gluten, the protein that makes bread chewy. By kneading, you stretch and align protein molecules. This creates the chewiness of great rolls.
- Builds dough strength
- Distributes ingredients evenly
- Creates smooth, elastic texture
- Improves overall bread quality
Kneading Techniques and Duration
Your kneading method depends on whether you’re working by hand or using a stand mixer. Here’s a quick breakdown:
| Method | Technique | Time Required |
|---|---|---|
| Hand Kneading | Push, fold, and turn dough | 8-10 minutes |
| Stand Mixer | Use dough hook attachment | 5-7 minutes |
The goal is to get a smooth, windowpane-like texture. If you can stretch a small piece of dough thin enough to see light through without tearing, you’ve kneaded perfectly!
Step 3: First Rise – Letting the Dough Rest
The first rise is key to making perfect Dinner Rolls. It turns simple ingredients into a light, airy dough full of flavor. Mastering the rising process can take your Stuffed Rolls from good to great.
When making Dinner Rolls, the first rise lets yeast do its thing. It’s when the dough gets complex flavors and becomes soft and tender. This makes homemade rolls hard to resist.
Creating the Perfect Rising Environment
Finding the right spot for your dough is important. You need a warm, draft-free area with a steady temperature. Here are some great places:
- Proofing setting on your oven
- Warm kitchen counter away from cold drafts
- Inside a turned-off oven with the light on
- Near a warm (not hot) appliance
Recognizing a Perfectly Risen Dough
Your Stuffed Rolls dough is ready when it shows these signs:
- Size doubling: It should grow to about twice its original size
- Soft, puffy texture when gently pressed
- Slight dome-like appearance
- Visible air bubbles underneath the surface
Pro tip: The best rising temperature is between 75-80°F (24-27°C). Use a kitchen thermometer to check if it’s just right for your Dinner Rolls’ first rise.
Step 4: Shaping the Rolls
Turning your bread into dinner rolls is all about shaping. The way you shape them affects their look and feel. This makes them the highlight of your meal.

Shaping dinner rolls is a mix of skill and creativity. You aim to make soft, uniform rolls that wow your guests.
Perfect Shaping Techniques
To shape like a pro, try these methods:
- Cupped-hand rolling method: Gently cup your hand over the dough piece on a clean surface
- Circular motion technique: Rotate the dough while applying light pressure
- Tucking method: Fold edges underneath to create a smooth top surface
Achieving Uniform Roll Size
Even size is important for the best dinner rolls. Here’s how to get it right:
- Use a digital kitchen scale for precise weight measurements
- Divide dough into equal portions visually
- Practice consistent hand-rolling technique
“The secret to perfect dinner rolls is in the shaping” – Professional Baker’s Wisdom
With these shaping tips, your bread will turn into top-notch rolls. Remember, the more you practice, the better you’ll get!
Step 5: Second Rise and Baking
After shaping your Easy Dinner Rolls Recipe Quick, you’re ready for the final step. This step turns simple dough into golden, Fluffy Dinner Rolls. It’s key for the texture and flavor of your homemade bread.
The second rise is a magical moment in bread making. Your shaped rolls need time to expand and develop their signature softness. Here’s what you should know:
- Cover the rolls with a clean kitchen towel
- Place in a warm, draft-free area
- Let them rise for 45-60 minutes
- Rolls should double in size
Preparing Your Oven
Proper oven preparation ensures perfectly baked rolls every time. Preheat your oven to 350°F (175°C) about 20 minutes before baking. Position the rack in the center for even browning.
Baking for Soft, Golden Perfection
Bake your rolls for 20-25 minutes until they turn a beautiful golden brown. For an extra touch of deliciousness, brush the hot rolls with melted butter immediately after removing them from the oven. This adds shine and enhances their irresistible flavor.
Pro tip: Tap the bottom of a roll – if it sounds hollow, they’re perfectly baked!
Storing and Freezing Leftover Rolls
After baking delicious homemade dinner rolls, you’ll want to keep their fresh taste and soft texture. Proper storage helps you enjoy your Breakfast Rolls or Stuffed Rolls for days.
Keeping Your Rolls Fresh
Storing your freshly baked rolls needs careful attention. Here are some key strategies to keep your rolls delicious:
- Room temperature storage in an airtight container
- Freezing for long-term preservation
- Proper reheating techniques
Short-Term Storage Solutions
For short-term storage, keep your Breakfast Rolls in a sealed container at room temperature. They’ll stay fresh for up to three days, keeping their soft texture and flavor.
| Storage Method | Duration | Best For |
|---|---|---|
| Room Temperature | Up to 3 days | Quick consumption |
| Refrigerator | Up to 1 week | Extended freshness |
| Freezer | Up to 3 months | Long-term storage |
Freezing and Reheating Techniques
Transform your leftover rolls into Stuffed Rolls or reheat them with these simple methods:
- Wrap rolls individually in plastic wrap
- Place in a freezer-safe bag
- Remove air to prevent freezer burn
When ready to enjoy, reheat your rolls in a 350°F oven for 5-10 minutes. Pro tip: Wrap in foil to prevent drying out and maintain moisture.
Serving Ideas for Your Dinner Rolls
Your homemade dinner rolls are perfect for making any meal special. They’re great for Holiday Sides or Christmas Dinner. These soft, fluffy breads can turn a simple meal into a memorable one.
Try pairing Sweet Dinner Rolls with flavored compound butters. Mix softened butter with honey, herbs, or roasted garlic for a tasty spread. At holiday gatherings, place your rolls in a rustic basket with a crisp linen napkin for a beautiful table setting.
For something new, use dinner rolls as slider bases or to soak up gravies and sauces. During Christmas, warm rolls can connect different flavors and add comfort to your festive meal. Try different ways to present your rolls to keep your meal exciting.
Your homemade rolls are more than a side dish. They’re a canvas for your creativity. Serve them warm with melted butter or as a base for unique appetizers. These rolls will definitely be a hit at your table.