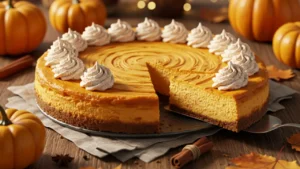
You remember the kitchen warmth, the smell that pulled you close and promised comfort. This introduction walks you through how small, tested steps turned that memory into a reliable dessert you can make again and again.
You pre-cooked the apple slices so the filling set without a watery gap under the lid. Blind baking the crust from frozen with parchment and beads gave you a crisp base every time.
Using a 9-inch metal tin and reducing drained juices with a dab of butter made the syrup cling to the fruit, boosting flavor. You learned to watch for bubbling juices and a deep golden top as the clearest signs the pie was done.
Resting for hours—overnight if you want neat slices—and reheating lightly kept the base crisp. This short roadmap will help you follow an old-fashioned recipe that balances nostalgia with practical, bakery-level results.
Old-Fashioned Apple Pie with Cinnamon
Equipment
- 9-inch metal pie tin For a crisp base
- Rolling Pin To roll out dough evenly
- Mixing Bowl For combining dough and filling
- Parchment Paper For blind baking crust
- Baking beads or dried beans To weigh down crust while blind baking
- Pastry brush For applying egg wash
- baking trays To roast apple slices
- small saucepan To reduce apple juice syrup
- Knife To slice apples and trim crust
Ingredients
- 6–8 Granny Smith apples, peeled and sliced (~1 cm thick)
- 1 cup brown sugar
- 1 tsp ground cinnamon
- ¼ tsp ground nutmeg
- ¼ tsp ground ginger
- 1 tsp salt
- 1 tsp butter (for reducing juices)
- 2 ½ cups all-purpose flour
- 1 cup unsalted butter (cold, cubed)
- 1 egg (beaten)
- 1 tbsp vinegar
- 4–6 tbsp ice water
- 1 extra egg for egg wash
- 1 tbsp sugar (for topping lattice)
Instructions
- Prepare crust: Mix flour, salt, and cold butter until crumbly. Add egg, vinegar, and ice water to form dough. Divide, shape into discs, and chill.
- Roll out dough and line a 9-inch metal pie tin. Prick base, then freeze lined crust for 2 hours.
- Blind bake crust: Preheat oven to 400°F (200°C). Line crust with parchment and baking beads. Bake 25 minutes, remove weights, brush with egg, bake 5 more minutes. Cool 15 minutes.
- Preheat oven to 350°F (180°C). Roast apple slices on trays for 15–40 minutes until just tender. Drain juices.
- Reduce drained juices with 1 tsp butter until syrupy (~1/3 cup). Set aside.
- Toss roasted apples with brown sugar, cinnamon, nutmeg, ginger, and salt. Layer tightly into cooled crust.
- Pour reduced syrup over apples. Roll top crust or lattice strips. Trim, seal, and crimp edges.
- Brush top with beaten egg and sprinkle with sugar. Bake at 375°F (190°C) for ~45 minutes or until juices bubble and top is golden.
- Cool at least 3 hours (preferably overnight) before slicing for neat portions.
- Reheat slices at 350°F for 10 minutes covered, or microwave for 1 minute and crisp in oven.
Notes
Nutrition
Table of Contents
Apple Pie: What Makes This Version Truly Old-Fashioned
You get a truly old-school result when fruit and crust are handled separately and with care.
Bake the apple slices first. Roast them on trays at 350°F (180°C; 160°C fan) for 15–40 minutes so the fruit cooks evenly and never turns mushy.
Drain the juices, then reduce them with 1 tsp of butter to about 1/3 cup. That syrup will cling to the apples and intensify the filling without soaking the base.
- Blind bake a frozen-lined crust at 400°F (200°C; 180°C fan) for ~25 minutes with baking beads; brush with egg wash and bake 5 more minutes for a crisp base.
- Use a 9-inch metal pie tin to avoid soggy bottoms.
- Cool the crust, then pack the apples tightly to eliminate the empty cavity beneath the top crust.
Watch for doneness: bake until juices bubble and the lattice turns deep golden brown. That visual cue, paired with steady bubbling, tells you the filling set and the crust is ready.
| Step | Temperature | Time | Result |
|---|---|---|---|
| Bake apple slices | 350°F / 180°C | 15–40 minutes | Tender, not mushy |
| Blind bake crust | 400°F / 200°C | ~25 + 5 minutes | Crisp, fully cooked base |
| Final bake | Varied oven heat | Until bubbling & golden | Set filling, golden top |
Tip: A light dusting of cinnamon keeps spice balanced so you taste the fruit in every bite.
Ingredients at a Glance: Granny Smith Apples, Brown Sugar, Cinnamon
Gather simple pantry staples and a tart, firm cooking fruit to build a balanced filling and a reliable crust.
For the crust
Flour, cold fat, salt, a beaten egg, ice water, and a splash of vinegar make a forgiving dough.
An all-butter pie crust gives richer flavor; a shortening crust yields extra flake. Use the vinegar-egg-ice water trick for a no-fail dough that rolls well.
Chill or freeze dough discs before rolling to improve handling and layer lift during baking.
For the filling
Use granny smith apples for tart balance and shape retention. Toss slices in a brown sugar and cinnamon mix with nutmeg and ginger for warm, classic flavor.
- Add a pinch of salt to boost sweetness.
- Measure about a cup of brown sugar and keep spices balanced so the fruit leads.
- Drain juices, then reduce them with 1 tsp butter to about 1/3 cup syrup that clings to the filling.
| Component | Key Ingredients | Why it matters |
|---|---|---|
| Crust | Flour, butter/shortening, egg, ice water, vinegar | Flavor and flake; vinegar + cold liquids prevent overworking |
| Filling | Granny Smith apples, brown sugar, cinnamon, nutmeg, ginger, butter | Tart fruit and reduced syrup keep structure and depth of taste |
| Prep tools | Bowl, measuring cup, rolling pin | Evenly tossed spices and measured sugar make consistent results |
Tip: Keep an extra egg for an egg wash to get a glossy, sealed top that resists soggy steam.
Pie Crust Options: All-Butter Shortcrust, Shortening, or Ready-Made
Choose your crust with care: the fat you use sets the flavor and the flake for every slice.
All-butter shortcrust for flaky texture and rich flavor
An all-butter pie crust gives richer flavor and a tender bite. It can be slightly less flaky than a shortening crust, but the taste is worth it when you want depth.
You can use a food processor to pulse cold butter into the flour. That keeps butter cold and creates a coarse-crumb dough fast.
- Measure flour carefully and keep dough hydration steady to avoid cracking.
- Chill or freeze dough discs so rolling is easier and layers hold up during baking.
- Freeze the lined crust briefly before blind baking to minimize shrinkage and improve structure.
Ready-made crust tips when you need to save time
On busy days a quality, ready-made crust can still bake up light and crispy. Home bakers praise this shortcut when schedules demand speed.
Regardless of your choice, blind baking is non-negotiable for a crisp base. Par-bake and protect the edges so the final pie browns evenly.
Tip: Match your crust choice to your time and taste—richly buttery for flavor, shortening-based for dramatic lift—but always protect the base with a proper blind bake.
Step-by-Step Recipe: From Preheat Oven to Golden Brown
Follow a clear sequence and you’ll finish with a glossy, bubbling top and a crisp base.
Start by preheating the oven and setting out a large bowl, a rolling pin, and a lightly floured surface so the dough rolls smoothly.
Line a 9-inch metal tin with chilled dough, prick the base, then freeze the lined tin to prevent shrinkage. Blind bake at 400°F (200°C; 180°C fan) for about 25 minutes with parchment and baking beads.
Remove the beads, lightly brush the base and sides (not the rim) with beaten egg, and return to the oven for 5 more minutes. Cool the crust for 15 minutes so hot pastry won’t soak the filling.
Bake apple slices on two trays at 350°F (180°C; 160°C fan) for 15–40 minutes until just tender. Drain their juices and reduce them with 1 tsp butter to about 1/3 cup of syrup that clings to the fruit.
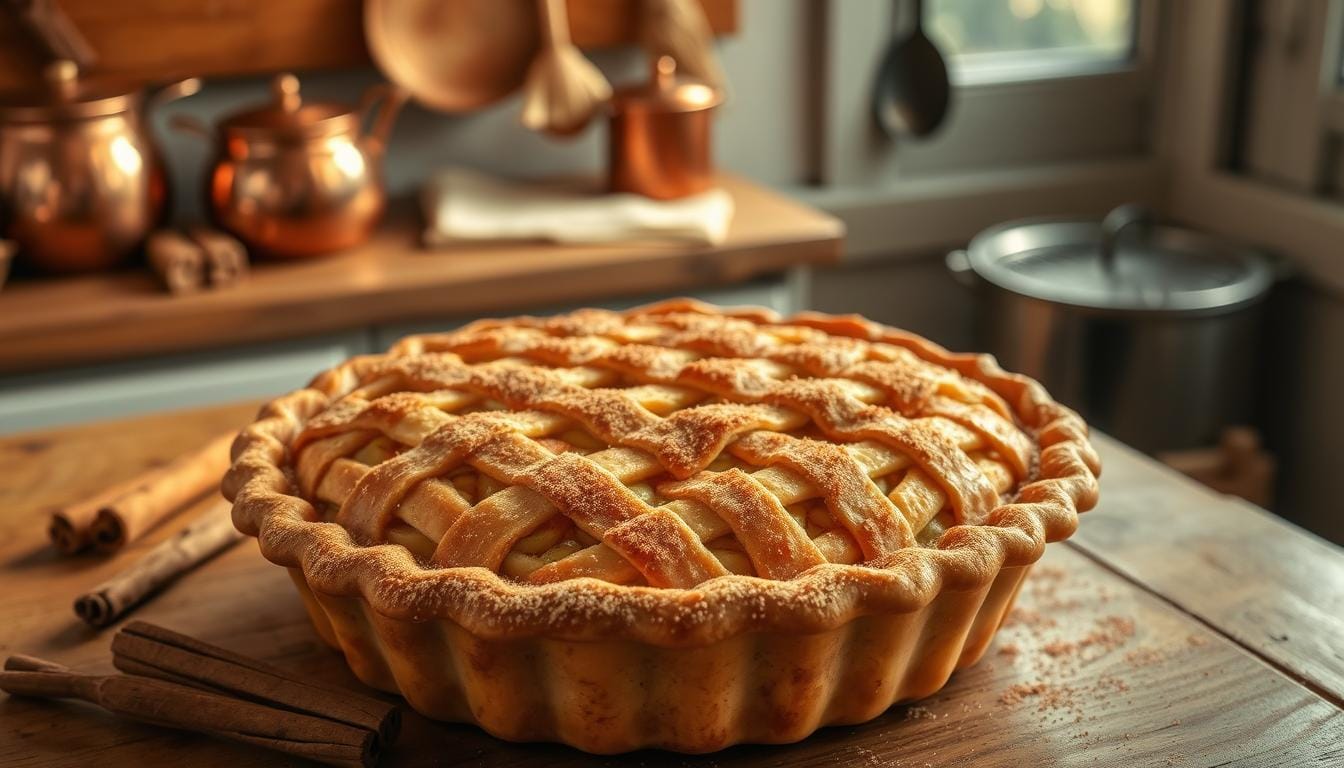
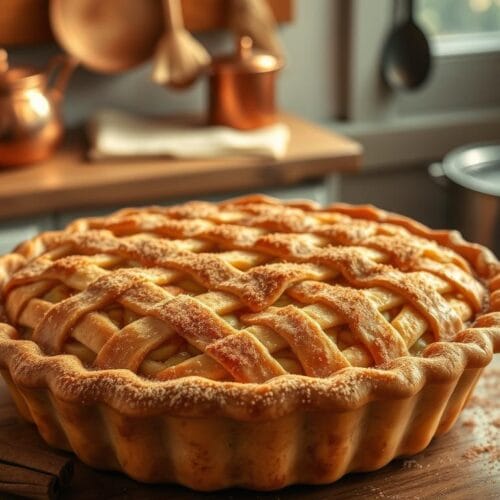
Layer the apples into the cooled crust, pour over the reduced syrup, then trim excess dough and weave a 12-strip lattice. Brush the lattice with egg and sprinkle a little sugar for sparkle.
Place pie in the oven and bake for roughly 45 minutes, or until juices bubble and the lattice turns deep golden brown. If edges brown too fast, protect them with foil or a rim shield. Cool before slicing so the filling sets.

Choosing the Best Apples and Slices for the Filling
Start by choosing the right fruit so your filling keeps bite and balance.
Why granny smith hold shape and bring tart balance
Granny smith apples are a classic choice because their firmness and high acidity give a bright, tart counterpoint to sugar and spice.
You want fruit that resists turning to mush. That firmness keeps layers defined and the final slice neat.
Even slices for consistent baking time
Cut slices about 1 cm (0.4 in) thick so they cook evenly. Uniform slices mean no raw cores or overcooked edges.
| Action | Thickness | Time to test |
|---|---|---|
| Slicing | ~1 cm / 0.4 in | — |
| Bake & test | Even slices | 15–40 minutes |
| Cool before assembly | — | Until knife meets no resistance |
- Pick the best apples by firmness and acidity for balance.
- Bake slices first to avoid a soggy base and collapsed top.
- Check tenderness early—some granny smith bake fast, others need longer.
Pro Tips for a Flaky, Crisp Base Every Time
A crisp underside starts with the right tin and quick, cool handling of the dough.

Choose a 9-inch metal pie tin to get a reliably crisp underside. Metal transfers heat faster than glass or ceramic, so the base browns and sets instead of staying soft.
Freeze the lined crust for about two hours to limit shrinkage. Prick the base roughly 30 times before blind baking. Use parchment and baking beads to hold shape, then brush the base and sides with a light egg wash as a moisture barrier.
Protect edges and adjust heat
Shield the rim with a foil ring and, if the top browns too fast, place a flat foil sheet over the lattice mid-bake. Let the shell cool 15 minutes before you add filling so hot juices don’t soak the base.
- Handle dough with cool hands to preserve flakes.
- Trim excess neatly so the rim seals with the lattice and won’t sag.
- If your oven bottom runs cool, place pie on a lower rack to crisp the base.
Quick reminder: blind bake thoroughly and bake long enough to cook sides and base, not just the top.
Time, Temperature, and Visual Cues You Can Trust
Precise oven settings and clear visual signals are the tools you use to judge doneness. Follow minutes as guidance, then confirm by color, bubbles, and aroma.
Oven settings for blind bake and final bake
Blind bake: preheat to 400°F (200°C; 180°C fan) and bake with weights for about 25 minutes. Remove weights, brush base and sides with a light egg wash, then bake 5 more minutes.
Apple slices: roast at 350°F (180°C; 160°C fan) for 15–40 minutes. Start checking early—different apples cook at different speeds.
How to read bubbling juices and lattice color for doneness
Assemble and bake the pie for roughly 45 minutes. Look for steady bubbles in the lattice gaps and a deep golden top.
- Use time as a guide, not a rule—adjust for hot spots and lattice thickness.
- Shield edges or the whole top with foil if browning ahead of the interior.
- Place the tin on a lower-middle rack to encourage a crisp base.
- Rest the baked pie at least 3 hours so the filling firms for clean slices.
Note: color, steady bubbling, and a warm, fruity aroma tell you more than the clock alone—take brief notes on minutes and rack position for your oven.
| Action | Temp | Minutes |
|---|---|---|
| Blind bake with weights | 400°F / 200°C | ~25 + 5 |
| Bake apple slices | 350°F / 180°C | 15–40 |
| Final bake assembled | Varied | ~45 |
Make-Ahead, Storage, and Freezer Tips
Plan your timing and storage so slices come out clean and the base stays crisp.

Resting: After baking, let the dessert cool at room temperature for at least 3 hours. For the neatest slices, refrigerate overnight and turn out before you cut.
Quick reheats that keep the crust crisp
Reheat a whole or sliced portion covered with foil in a 350°F oven for about 10 minutes. For speed, microwave a single slice for roughly 1 minute, then crisp briefly in the oven if you can.
Freezer strategies for busy days
Freeze dough discs or a lined crust for up to a month so you can bake from frozen. Wrap a fully baked, cooled pie well and freeze for several days, then thaw a little before reheating.
- Portion slices in advance for quick desserts during the week.
- Thaw frozen pies gently and reheat until the top regains its snap.
- Use foil to control moisture and avoid dry edges.
Tip: Treat time and temperature gently—this keeps the filling firm and the crust pleasantly crisp when you serve later.
Serving Suggestions: Vanilla Ice Cream, Hard Sauce, and More
Presentation turns a good dessert into a memorable one. Place each wedge on a warmed plate so the crust stays crisp and the filling holds its shape. Warm slices briefly before topping so cold vanilla melts into the lattice and lifts the cinnamon notes.
Warm servings and nostalgic toppings
Serve warm with a scoop of vanilla or a spoon of hard sauce for contrast. A little reheating brings the syrup back to life without soggy edges.
Clean cuts and neat plating
Rest or chill the dessert overnight for cleaner cuts. Wipe your knife between slices and use a warm, thin blade to glide through the crust without tearing the top.
- Sprinkle regular sugar on the lattice before baking for sparkle and subtle crunch.
- Balance richness with fresh whipped cream if you prefer a lighter finish.
- Garnish with a pinch of cinnamon or a few toasted pecans for texture and aroma.
- Place pie at center table so guests admire the deep golden top before you serve.
Tip: Reheat a slice briefly, add toppings, and serve immediately to enjoy warm filling and cold topping together.
Conclusion
This final note wraps the method into clear, repeatable steps so you can bake with confidence.
Key takeaways: bake the apple slices first, blind bake a frozen-lined pie crust in a 9-inch metal tin, egg wash the base and cool before filling, and reduce the juices with a dab of butter into a glossy syrup.
Watch for steady bubbling and a deep golden lattice as your doneness signals. Rest the finished dessert at least three hours or chill overnight for neat slices.
Reheat covered with foil at 350°F for about ten minutes (or microwave briefly for one minute) so the crust stays crisp and the filling warms without weeping. Serve with vanilla ice cream or hard sauce to complete this classic pie recipe.
FAQ
What makes this old-fashioned apple pie with cinnamon different from modern versions?
Why should you bake the fruit slices before assembling?
When is blind baking the crust necessary?
Which apples work best for the filling?
What ingredients are essential for a reliable crust?
How do you prevent the edges from over-browning?
How long and at what temperature should you bake the filled pie?
Can you use ready-made crusts or should you make your own?
What are signs the filling is done?
How do you get clean slices when serving?
How can you store or freeze the dessert?
Any pro tips for a crisp underside every time?
What spices and sweeteners work best in the filling?
How much should you trim and how do you finish the top?
“Curious about what’s happening behind the scenes? Follow our kitchen adventures and more on Facebook.”